The Sixth Sense
 Norbert on LaunchBar —

As a longtime LaunchBar user, you probably know them all — LaunchBar’s five superpowers: Abbreviation Search, Browsing, Sub-search, Send To and Instant Send.
With LaunchBar 6.1, we are proud to introduce a sixth superpower: Staging.
Staging is a technique that allows you to create multiple selections in LaunchBar and to act on all of these items at once. Here are just a few examples:
- Select multiple files and send them via email.
- Or archive them into a ZIP file.
- Or move them to the Trash.
- Select a couple of songs or albums and play them in iTunes.
- Select a series of emoji, and insert all of them in one go.
- Send one or more files to multiple email recipients.
- Launch a bunch of apps at once.
- Open a number of web bookmarks.
- Perform a web search on multiple search engines simultaneously.
- etc.
How to create a multiple selection in LaunchBar
LaunchBar collects items that participate in a multiple selection in a so called staging area. You can add or remove (stage or unstage) items with a few keystrokes.
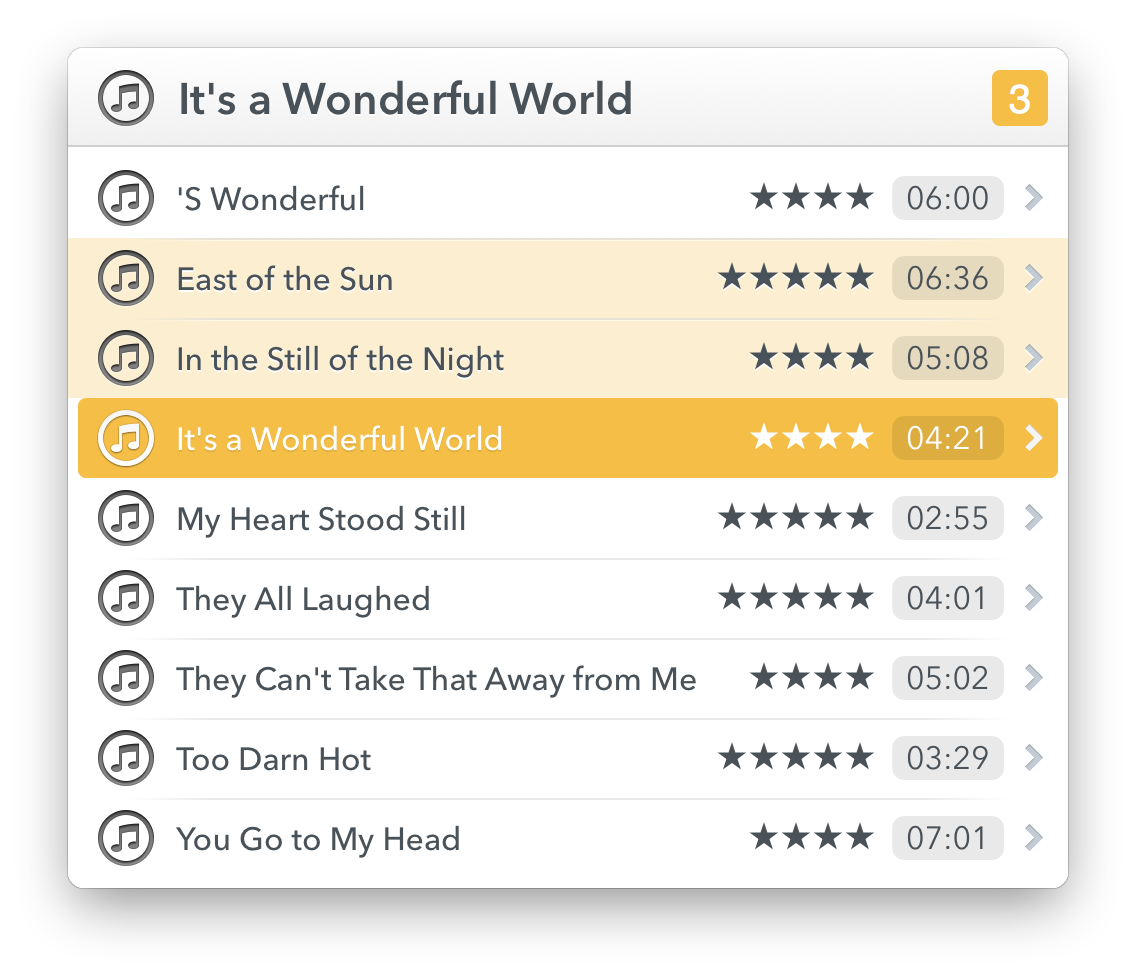
For example, just as in Finder, you can press ⇧↓ to select a number of adjacent items. The total number number of staged items is shown at the right edge of the bar, and the staged items themselves are marked with a somewhat lighter highlight color. Note that the selected item (dark highlight color) is implicitly staged (more on that later).
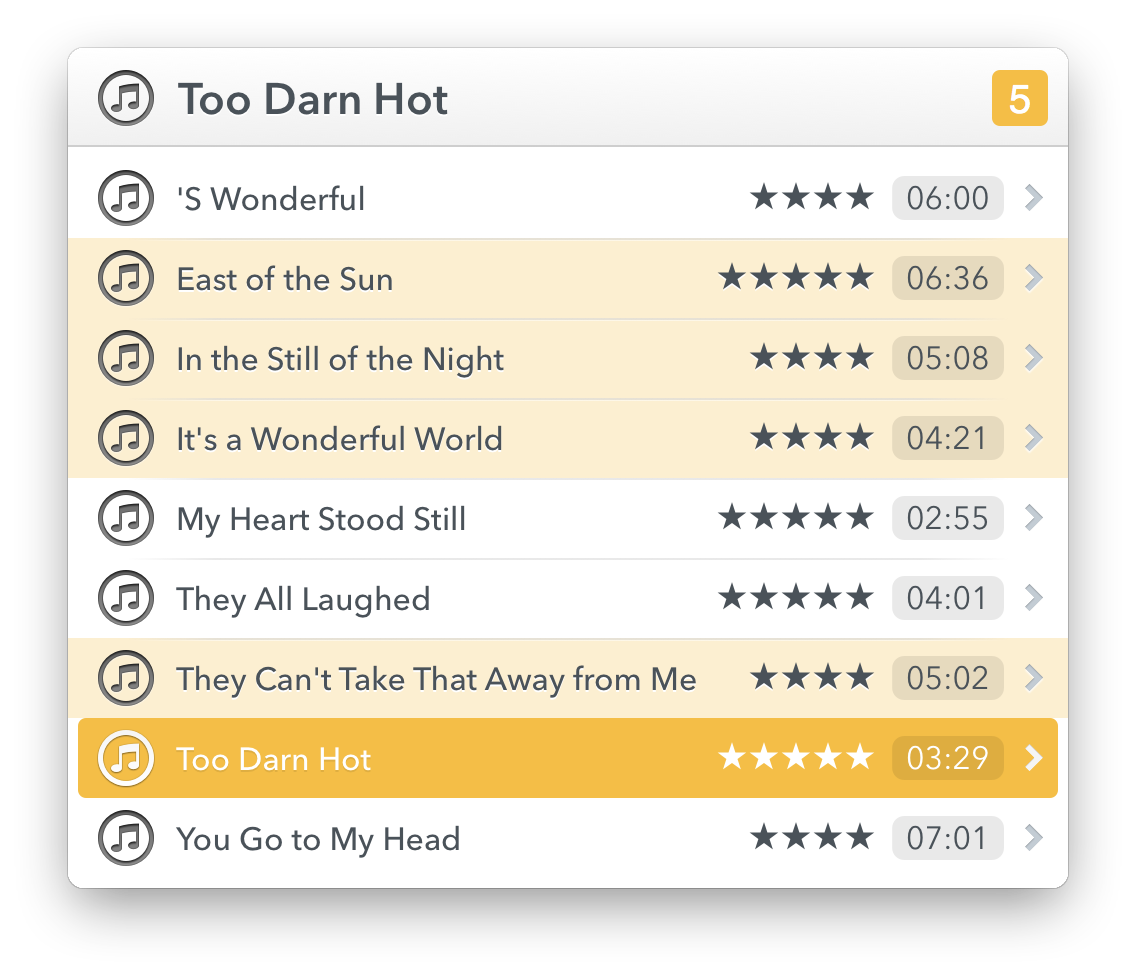
Multiple selections are not limited to adjacent items, though. You can stage additional items individually, even from completely different locations:
Shortcuts to create and modify multiple selections
The following shortcuts are available to add or remove items from the staging area:
- ⇧↓ and ⇧↑ stages or unstages a range of adjacent items.
- ⌘↓ and ⌘↑ toggles staging of the selected item.
- Comma stages the selected item.
- ⌘A stages all items in the current list.
- ⌫ unstages the selected item.
- Escape or ⇧⌫ clears the entire staging area.
You can also stage/unstage items with the mouse:
- ⌘-Click toggles staging of the clicked item.
- ⇧-Click stages/unstages a range of items.
Implicit staging of the selected item
The selected item (the one with dark highlight color) is always part of a multiple selection. It’s therefore not necessary to explicitly add it to the staging area.
For example, to send an email to two people, John and Paul, you just type “JOHN,PAUL” and hit ↩. Typing “JOHN” selects the first recipient, typing comma adds it to the staging area, typing “PAUL” selects the second recipient, and since Paul is implicitly staged you can immediately press ↩ to create an email to both contacts.
Acting on multiple selections
Once you’ve staged multiple items, you can act on these items pretty much the same way as you do with single items. Press ↩ to open them, press ⇥ to send them to an action, move them to a folder, and so on.
Here are a few examples:
- Press ↩ to open multiple apps, files & folders, contacts & email addresses, bookmarks, emoji, snippets, songs, albums, etc.
- Press ⇥ to invoke Send To, then select a target: - Select an app to open files with that app.
- Select one (or more) contacts to send files as email attachments.
- Select a folder to move or copy files to that folder.
- Select the Compress (ZIP Archive) action to … well … create a compressed ZIP archive.
- Invoke actions on multiple selections, for instance: - Move to Trash (⌘⌫)
- Duplicate (⇧⌘D)
- Eject (⌘E)
- Copy (⌘C)
- Get Info (⌘I)
- Show in Finder (⌘↩)
Inspecting and reviewing staged items
Whenever there are items in the staging area, the number of staged items is shown in a badge at the right edge of the bar:
You can quickly show a list with all currently staged items by pressing ⇧→.
(Wait! Wasn’t ⇧→ the shortcut for Info Browsing? You’re right. We’ve changed the Info Browsing shortcut to ⌥→ in order to get a more consistent, easy to remember set of staging shortcuts).
While this list of staged items is visible, you can press ⌫ to remove items from the staging area. And you can press ⌥↑ or ⌥↓ to rearrange items in the list. This is useful when the order of items is relevant, e.g. in case of songs (when you wish to play them in a particular order) or contacts (when you want a recipient to be first in the To-field of an email).
Automatic clearing of the staging area
As soon as you’ve acted on a multiple selection, the staging area gets cleared automatically.
If you wish to reuse a previous multiple selection again for some other action, you can retrieve it from LaunchBar’s Recent Items list (⌘B).
Note that the staging area also gets cleared whenever you leave the LaunchBar interface (e.g. when you switch to another application), even if the staged items haven’t yet been used for any action. This is to make sure that when you later get back to LaunchBar, it’s in a predictable “clean state”, so you can type e.g. “⌘Space SAF ↩” to launch Safari without having to worry that this also unintentionally opens any previously staged items.
But same as before, you can type ⌘B to retrieve the previous multiple selection from the Recent Items list.
Start staging today!
We think that LaunchBar’s new staging capabilities are great way to further help you improve your productivity. So have fun with this new superpower, and — as always — keep your hands on the keyboard!